Site That Will Allow Clients to Upload Files

Want to let your website visitors upload images to your WordPress site? Using a simple form makes this like shooting fish in a barrel for your users without giving them access to log in.
In this commodity, we'll prove you how to permit users to upload images to your WordPress site apace and easily.
Create Your WordPress Image Upload Course Now
Tin Users Upload to WordPress?
Aye, users can upload dissimilar types of files to WordPress sites. For instance, yous can use WPForms every bit an paradigm uploader plugin since information technology allows file types like images, audio, video, and documents to exist uploaded with a single click.
You can fifty-fifty view these uploads as attachments within your WPForms entry management screen.
Why Let Users to Upload an Image?
Yous might wonder when it makes sense to allow your website visitors to upload image files to your site.
WPForms is the best WordPress Form Builder plugin. Get it for free!
Inserting images into a form is non only easy, merely it can also exist actually helpful. Here are only a few means your WordPress contributor tin can use an paradigm upload form:
- To add images to their profile photos
- Adding images to their invitee blog mail submissions
- Adding an prototype to a custom society form
- Gathering testimonials of your products
- Letting users submit events on a calendar
…and you can probably recollect of quite a few more than reasons to use an image uploader for WordPress!
Having an prototype upload form saves you fourth dimension since you don't have to upload the user'south images yourself. Information technology also helps to keep your site secure, because yous don't have to give all your users access to log in to your site if they want to upload images.
So, let's see how to allow users to upload images to your WordPress website.
How to Permit Users to Upload Images to Your WordPress Site
WPForms is an incredibly versatile plugin. Nosotros can apply it as a WordPress image upload plugin using its elementary drag-and-drop functionality without touching any lawmaking.
Check out the video above or read alee to notice out exactly how yous can have a user submitted image using WPForms step past step.
Step i: Create an Image Upload Form in WordPress
The first thing yous need to do is install and actuate the WPForms plugin. Here's a step-by-stride guide on how to install a WordPress plugin.
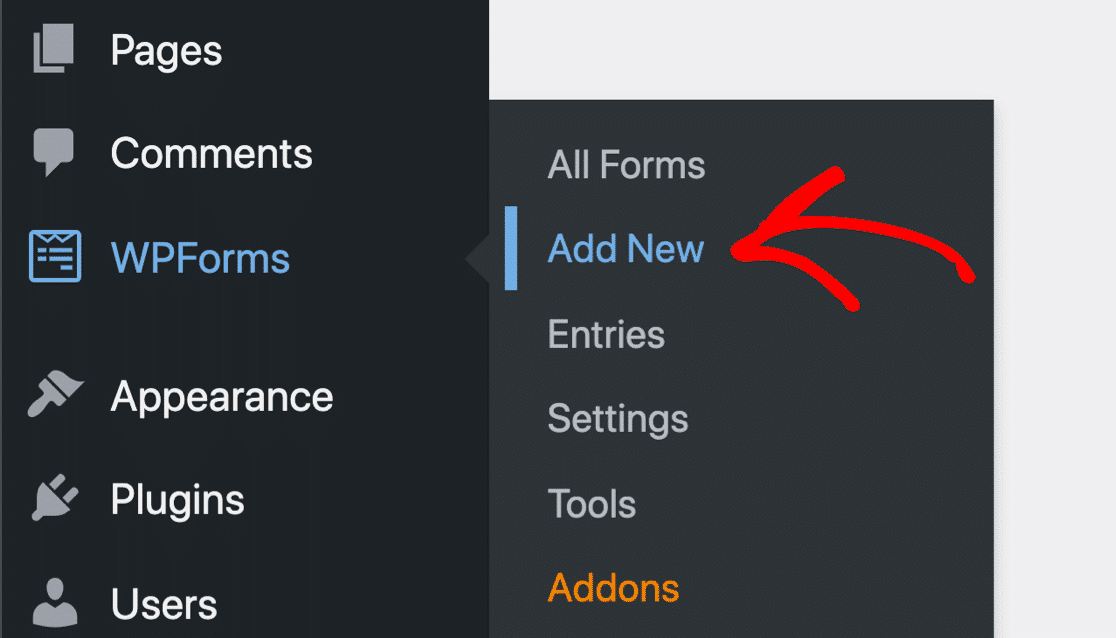
Next, you'll need to create a new class. Go toWPForms » Add New in your WordPress carte du jour.
Then you tin proper noun your form and pick a template if you want to. WPForms has a File Upload Grade template that comes with all the required fields and settings to allow visitors to upload files to your website.

Plus, you can create the post-obit types of forms using our gallery of 300+ pre-fabricated forms:
- Blow report grade
- Contest entry form that requires image submissions to enter
- Employee Information forms and then you tin can create employee identification badges
- Student enrollment form
- Recipe itemize form
- School ID registration form
- Support ticket form for accepting user uploaded images and screenshots of problems
- Club course that lets users upload images for custom products and accepts payments with Authorize.Net, Stripe, Foursquare, or PayPal
- And many more
If you lot want to see the file upload class template in action, head over and check out our sample file upload form demo.
Whether you build your file upload form from scratch or apply a template, make certain to include one of the following fields:
- File Upload : This field will add a elementary file uploader to your form so you can allow visitors to upload files to your website. You lot tin check out our tutorial on how to create a file upload class equally an case to go started. For more information, check out our complete guide to the File Upload field.
- Rich Text: If you're using WPForms as an image upload plugin for guest or sponsored posts, you tin can let users add their images correct to their post content with the Rich Text field. For more information, run across our complete guide to the Rich Text field.
You can also add additional fields to your form by dragging them from the left-hand console to the correct-manus panel.
And then, click on the field to brand whatsoever changes. You lot tin also click on a class field and elevate information technology to rearrange the order on your image upload form.
Step 2: Edit Your File Upload Field Options
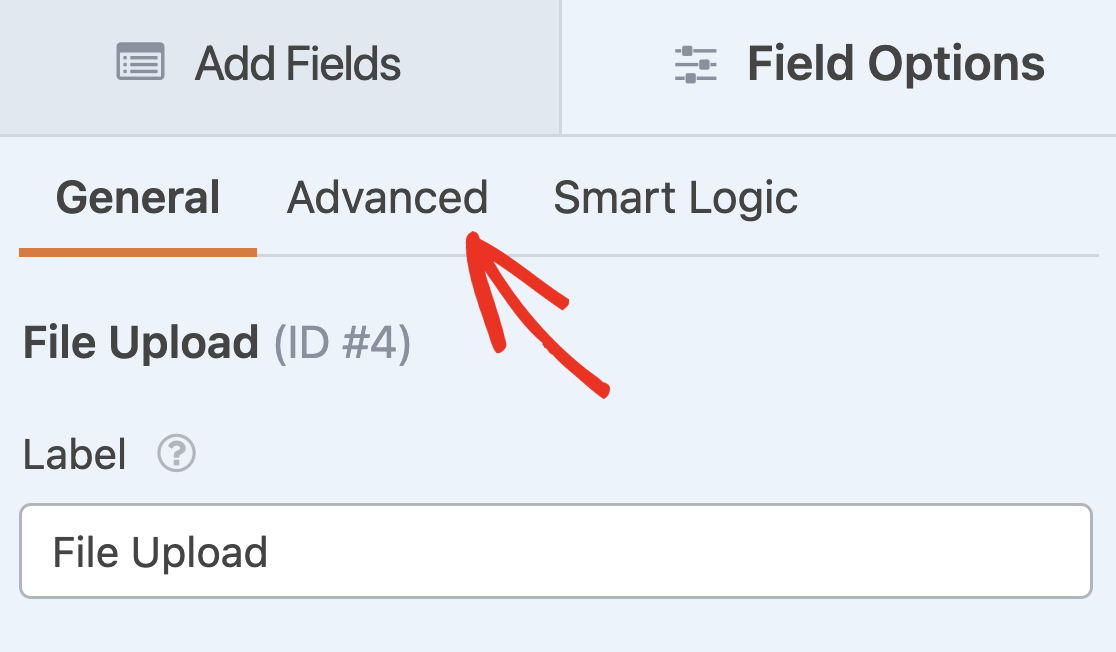
WPForms lets you save file uploads from your forms in your WordPress Media Library if you want to. To set this upwardly, click on your File Upload field to meet its options in the left panel.
Then click on theAvant-garde tab.
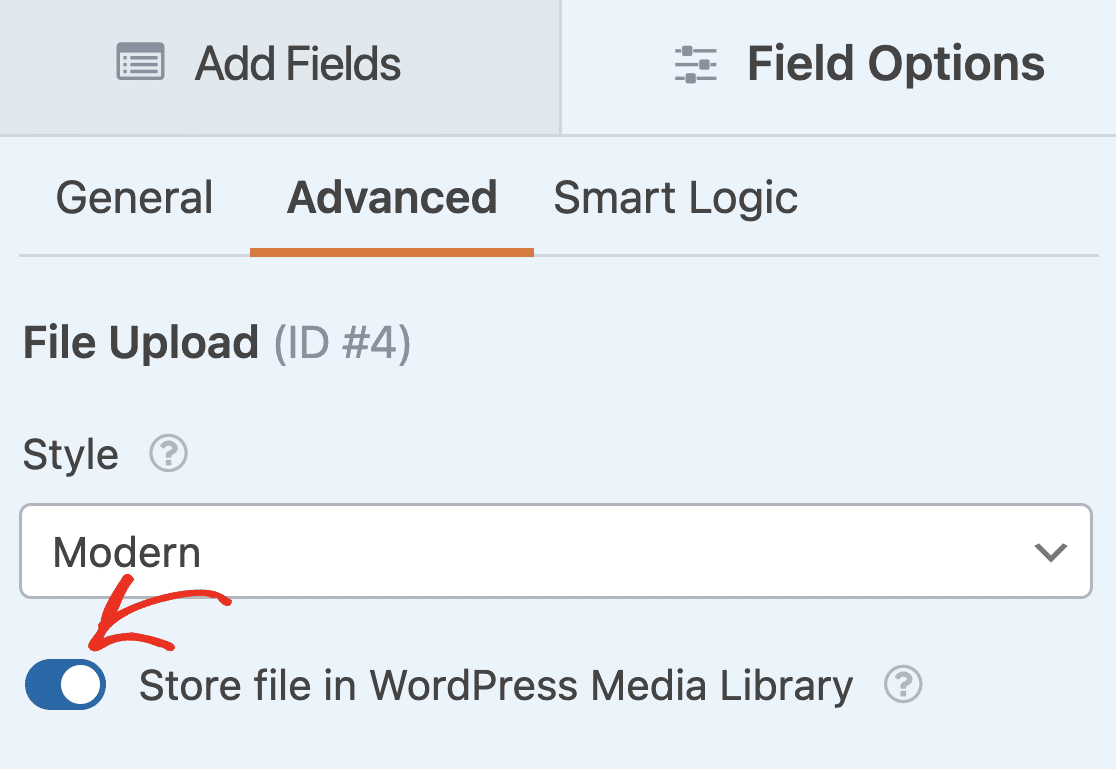
If you lot want to store uploaded images in your Media Library, turn on theStore file in WordPress Media Library option.
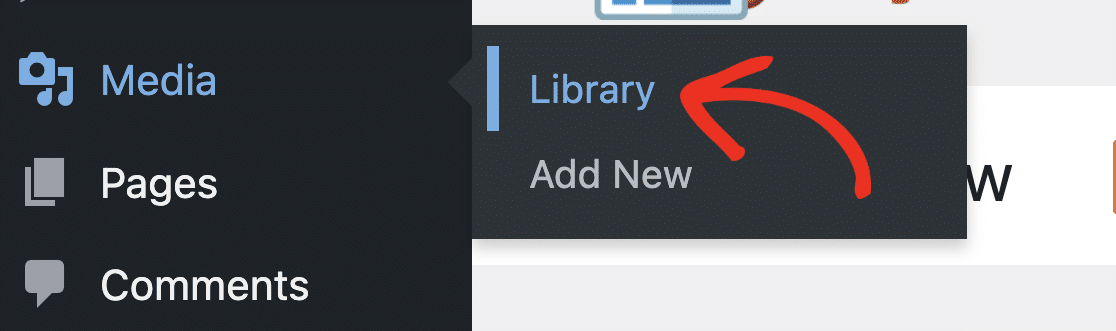
This mode you can admission images users submit from the Media » Library menu in your WordPress dashboard.
Once images are in the Media Library, you tin display them on your site!
If yous're using the Rich Text field to let users upload images to your WordPress site, you'll get-go need to open its field options and turn on theAllow Media Uploads option.
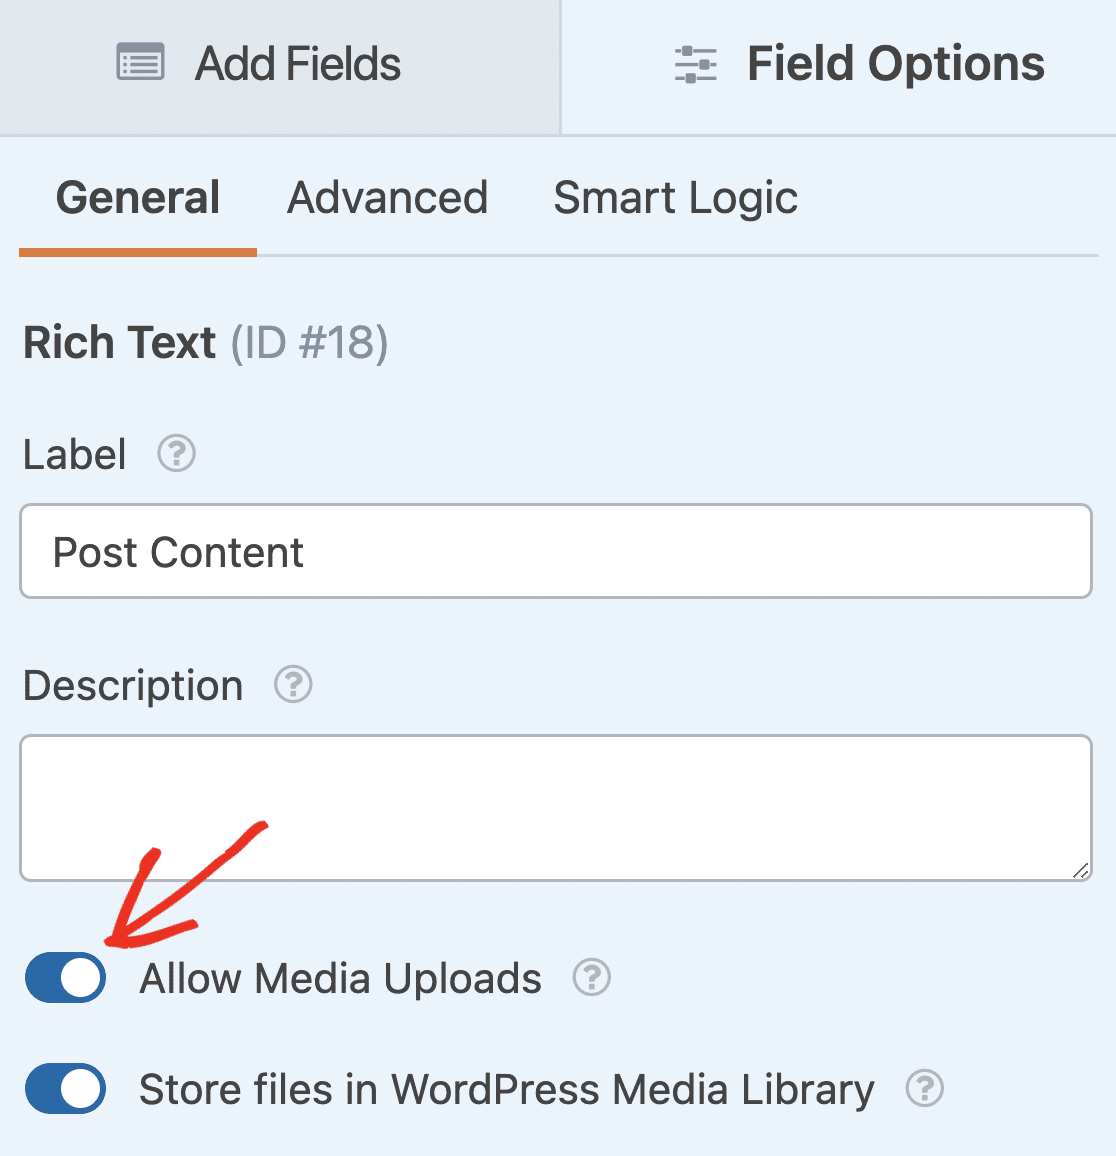
Then you can turn on the Store file in WordPress Media Library option as well if you want.
Keep in mind, y'all can accept lots of dissimilar file types through your forms.
WPForms makes uploading images piece of cake for your site visitors…whether they want to upload all kinds of file types to your contact forms, including merely non express to:
- Documents (.doc, .xls, .ppt, and .pdf)
- Images (.png, .gif, and .jpg)
- Video (.mpg, .mov, and .wmv)
- Audio (.wav, .mp3, and .mp4)
For WordPress security reasons, the default file types that tin be uploaded are limited. Here'south how to permit additional file upload types to your forms, and a more specific tutorial on enabling Adobe Illustrator file uploads.
If you'd like to increase the maximum upload epitome size for your site, you lot'll demand to reach out to your WordPress hosting provider to find out if it'southward possible. Sometimes things like a total-size image tin can be actually huge. For more details, cheque out this tutorial on increasing the maximum file upload size in WordPress.
When your form looks the way you lot desire it to, click Save.
Step 3: Customize Your Image Upload Class Settings
Once your form is to your liking, go to Settings » General.
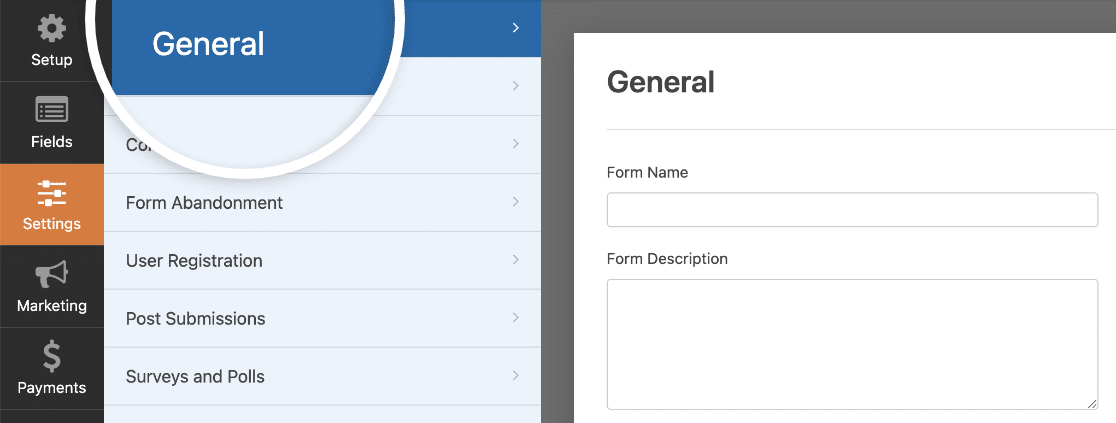
Hither you can configure:
- Form Proper name— Modify the name of your course here if you'd like.
- Form Clarification — Give your class a clarification.
- Submit Button Text — Customize the copy on the submit button.
- Submit Push button Processing Text — Modify the text that volition be visible while your form is beingness submitted.
- Enable anti-spam protection — Stop contact grade spam with the anti-spam feature, hCaptcha, or Google reCAPTCHA. The anti-spam setting is automatically enabled on all new forms.
There are likewise advanced settings you can customize:
- Form CSS Classes — Add custom CSS to your form.
- Submit Button CSS Class — Add CSS to your submit push button.
- Enable Dynamic Fields Population — You lot can use this setting to auto-fill up some fields in your form.
- Enable AJAX form submission —Enable AJAX settings with no page reload.
- Disable storing entry information in WordPress — Yous can disable the storing of entry information and user details, such every bit IP addresses and user agents, in an effort to comply with GDPR requirements. Check out our footstep-past-step instructions on how to add a GDPR agreement field to your form.
Save your form again in one case your settings wait right.
Step 4: Configure Your Class Notifications
You tin can send a notification email whenever someone submits this form on your website.
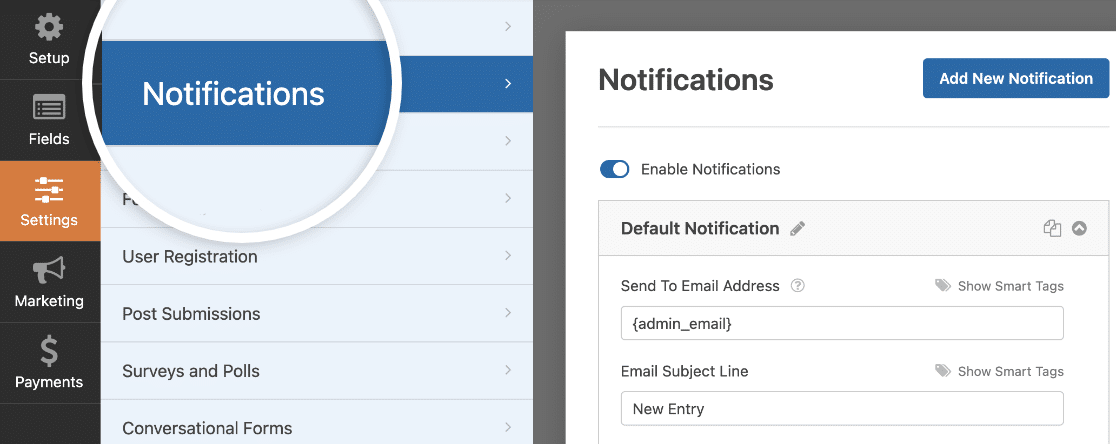
Unless you disable this characteristic, whenever someone submits an uploaded image, you'll get a notification about it.
If you lot use Smart Tags, you can likewise send a notification to the site visitor when they fill up out the form, letting them know y'all received their paradigm, and you'll be in contact shortly.
And what'south really cool is that since file attachments tin often hurt email deliverability, WPForms doesn't attach your users' files in notification emails. Instead, we send the file uploads via electronic mail an image link.
This assures people their course has gone through. For help with this stride, cheque out our documentation on how to set upwards class notifications in WordPress.
WPForms also lets you notify others when a course is submitted on your site. For assist doing this, check out our step-by-footstep tutorial on how to send multiple class notifications in WordPress.
Lastly, if you want to go along the branding of your emails consistent for your small business, you lot can check out this guide on adding a custom header to your e-mail template.
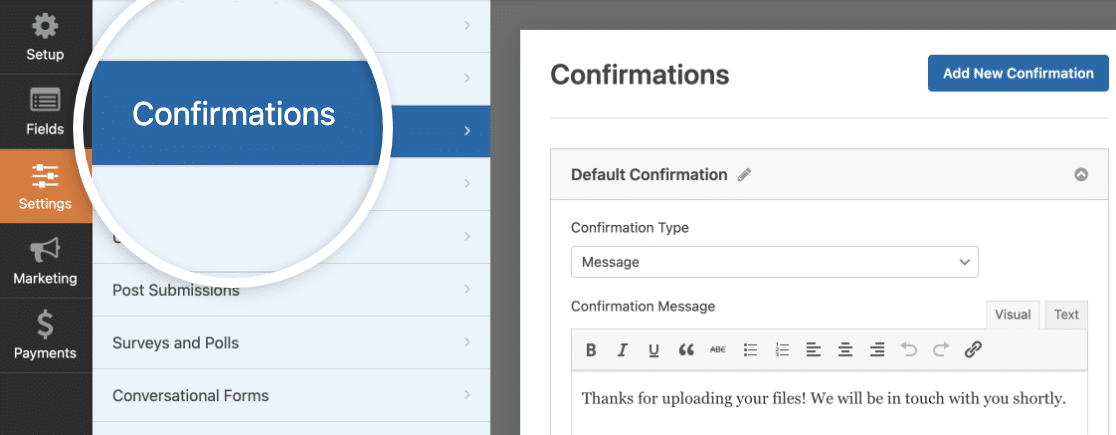
Step v: Configure Your Class Confirmations
Grade confirmations are messages that brandish in one case someone submits their responses to your grade.
They let people know that you've processed their course and offer you the chance to let them know what steps they must accept side by side.
WPForms has iii confirmation types to choose from:
- Bulletin: This is the default confirmation blazon in WPForms. When someone submits to your form, a simple message volition appear, letting them know their form was processed. Check out some great success messages to assist boost user appointment.
- Show Page: This confirmation blazon will accept users to a specific web folio on your site thanking them for submitting the form or send them to another page where they can access other data. For assist to do this, check out our tutorial on redirecting customers to a Thank you page. Also, exist certain to check out our article on creating effective Thank you pages.
- Become to URL (Redirect): This option is for when you want to ship site visitors to a different website.
Here'southward how to set up up a simple class confirmation in WPForms and then y'all can customize the message people volition run into when they upload an epitome to your WordPress site.
To start, click on the Confirmations tab in the Course Editor nether Settings. Then customize the confirmation bulletin to your liking and click Save.
For help with other confirmation types, run into our documentation on setting up grade confirmations.
Stride 6: Publish Your WordPress Image Upload Course
Now that you've congenital your form, you'll need to add it to your WordPress website to go your file uploader up and ready.
WPForms allows you lot to add your forms to lots of locations on your website, including your WordPress web log posts, WordPress pages, and even sidebar widgets.
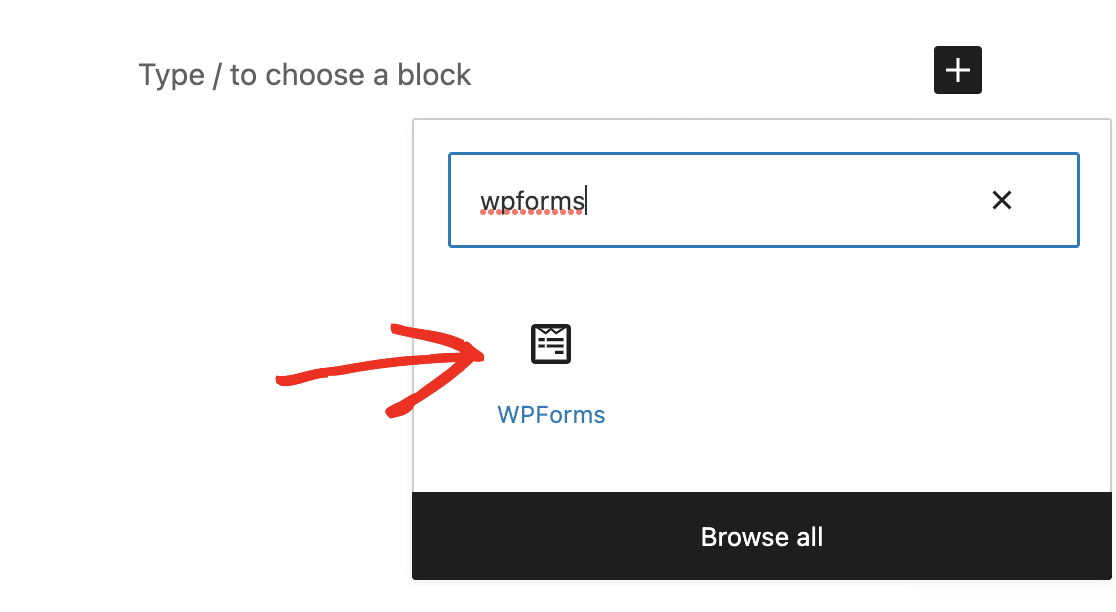
To brainstorm, create a new page or post in WordPress, or become to the update settings on an existing ane. Later on that, click on the plus (+) icon and search for and click on WPForms.
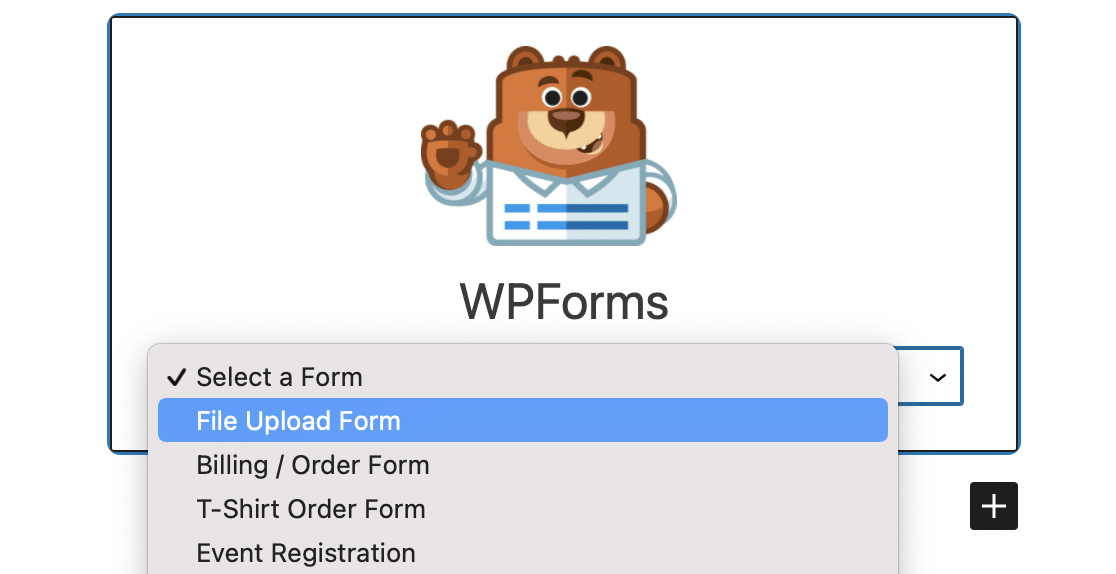
The WPForms widget will appear inside your block. Click on the WPForms dropdown and option your file upload form to insert it into your folio.
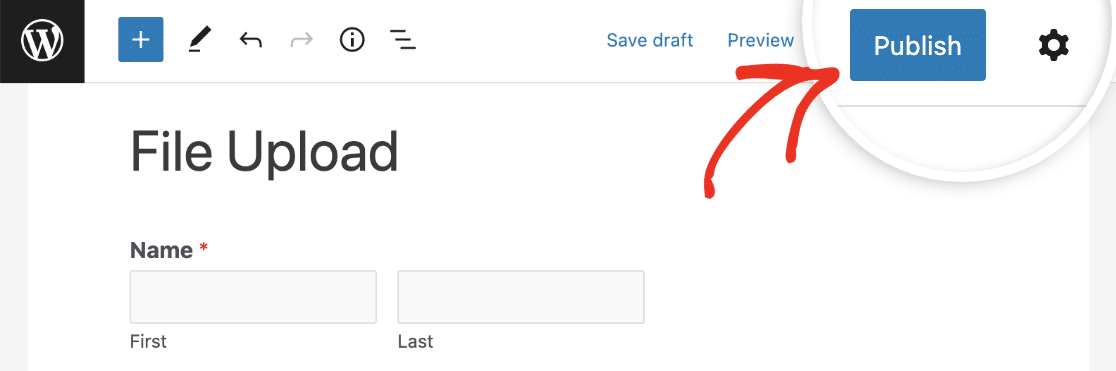
The course will now show up, and you can check to make sure you like the way it looks. Then publish or update your form then information technology appears on your website.
Now, publish your postal service or page so your WordPress upload form appears on your website.
Ok, now that yous're getting images from users on your forms, let'south cheque out how to run into those files.
Stride 7: View the Uploaded Files
Want to see your form entries and the uploaded files from users? You can view, search for, filter, print, and delete any of the entries. Practice yous want to let but logged-in users to upload images to your site? Check out the Form Locker addon.
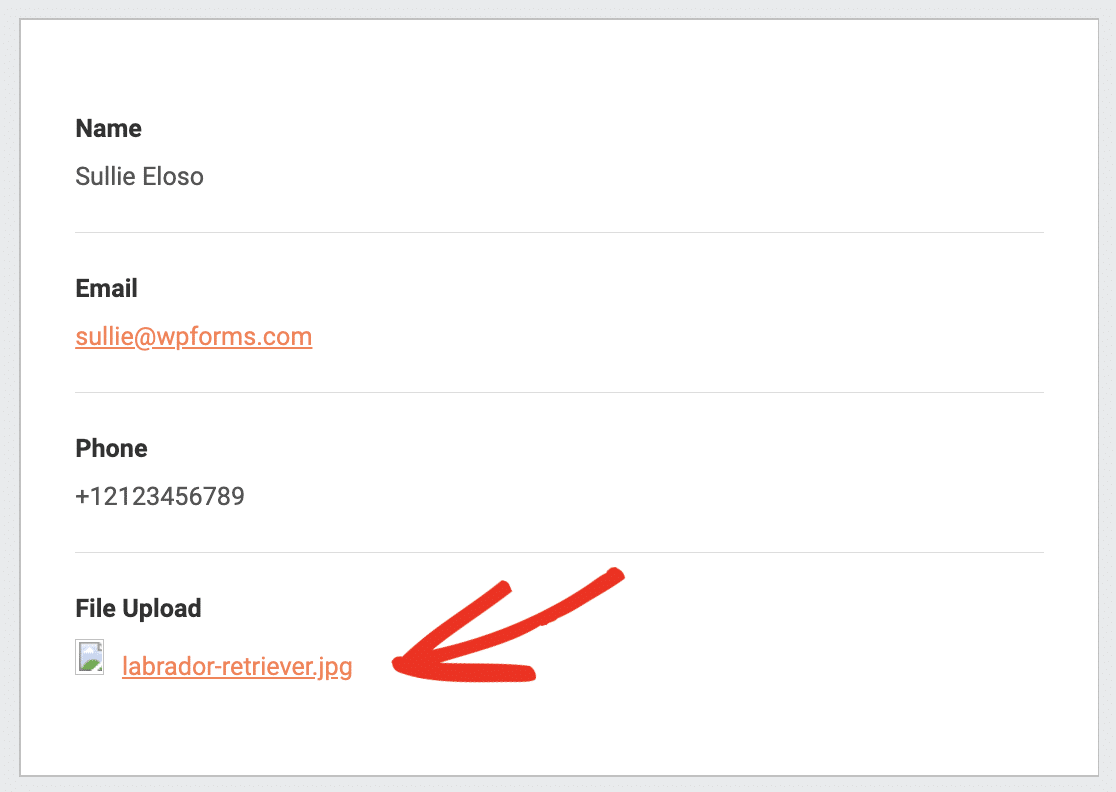
To meet the entries, head to your WordPress dashboard and click on WPForms » Entries. And so you'll encounter the Entries screen that shows you all your forms. Click on your file upload course to come across its submissions and striking Viewto see details about a specific entry.
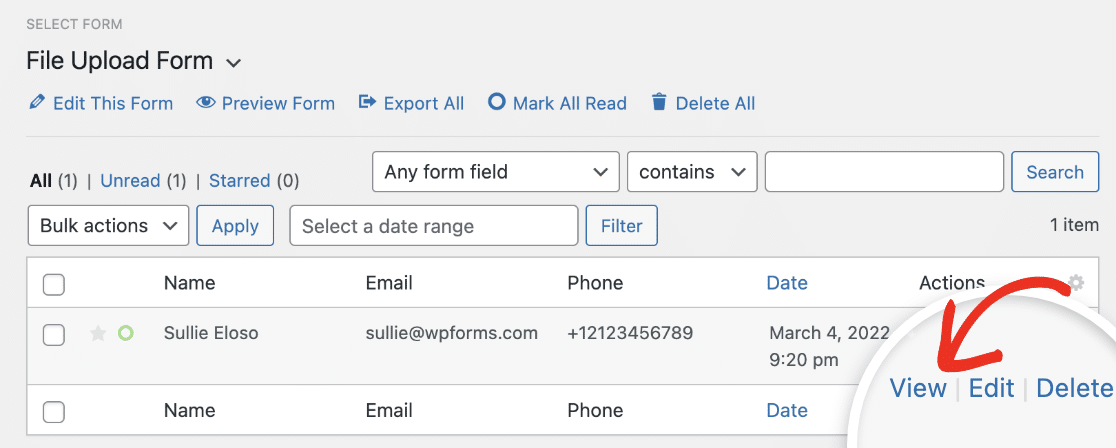
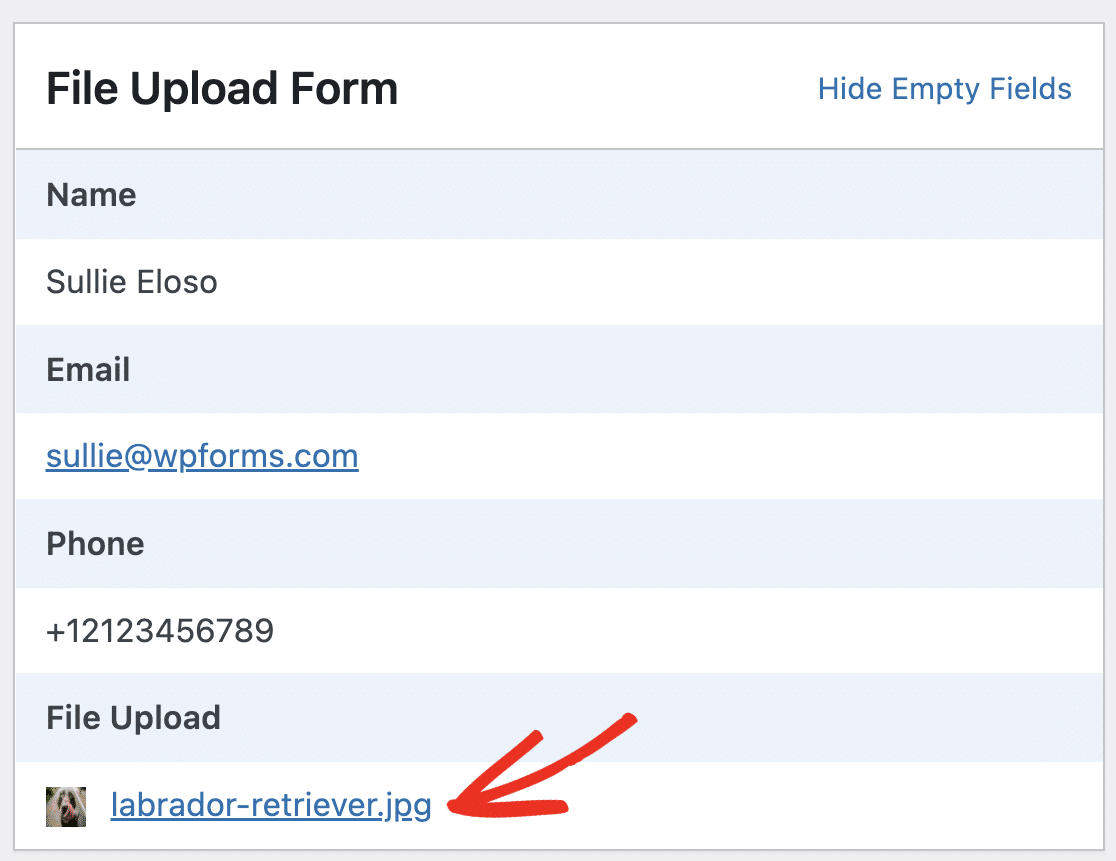
Now that you're inside the entry, you'll exist able to see the file proper noun, plus click on it to view and/or download it.
Check out this complete guide to course entries if you lot'd like to learn fifty-fifty more.
And there you have it! You now know how to permit users upload images to your WordPress site.
Click Hither to Create an Image Upload Class At present
Adjacent, Let Users Submit Weblog Posts
Want your users to exist able to submit a whole web log post, instead of just an paradigm? Bank check out our guide on how to allow users to submit blog posts.
So, what are you waiting for? Get started with the most powerful WordPress forms plugin today. WPForms Pro comes with a costless file upload class template and a xiv-24-hour interval money-back guarantee!
And don't forget, if you like this article, and so please follow united states of america on Facebook and Twitter.
Source: https://wpforms.com/users-submit-images-to-wordpress/